Publish your Cypress Test Report with GitHub Actions
Table of Contents

Ever wonder how to prepare nice looking test execution report with videos in Cypress? If so this blog post is for you! I will explain how to step-by-step configure Cypress project to generate beautiful HTML report and how to automatically publish it on GitHub Pages using GitHub Actions.
Cypress is one of the most popular test automation framework nowadays. It’s open source, easy to learn and has lots of nice features that can accelerate your testing.
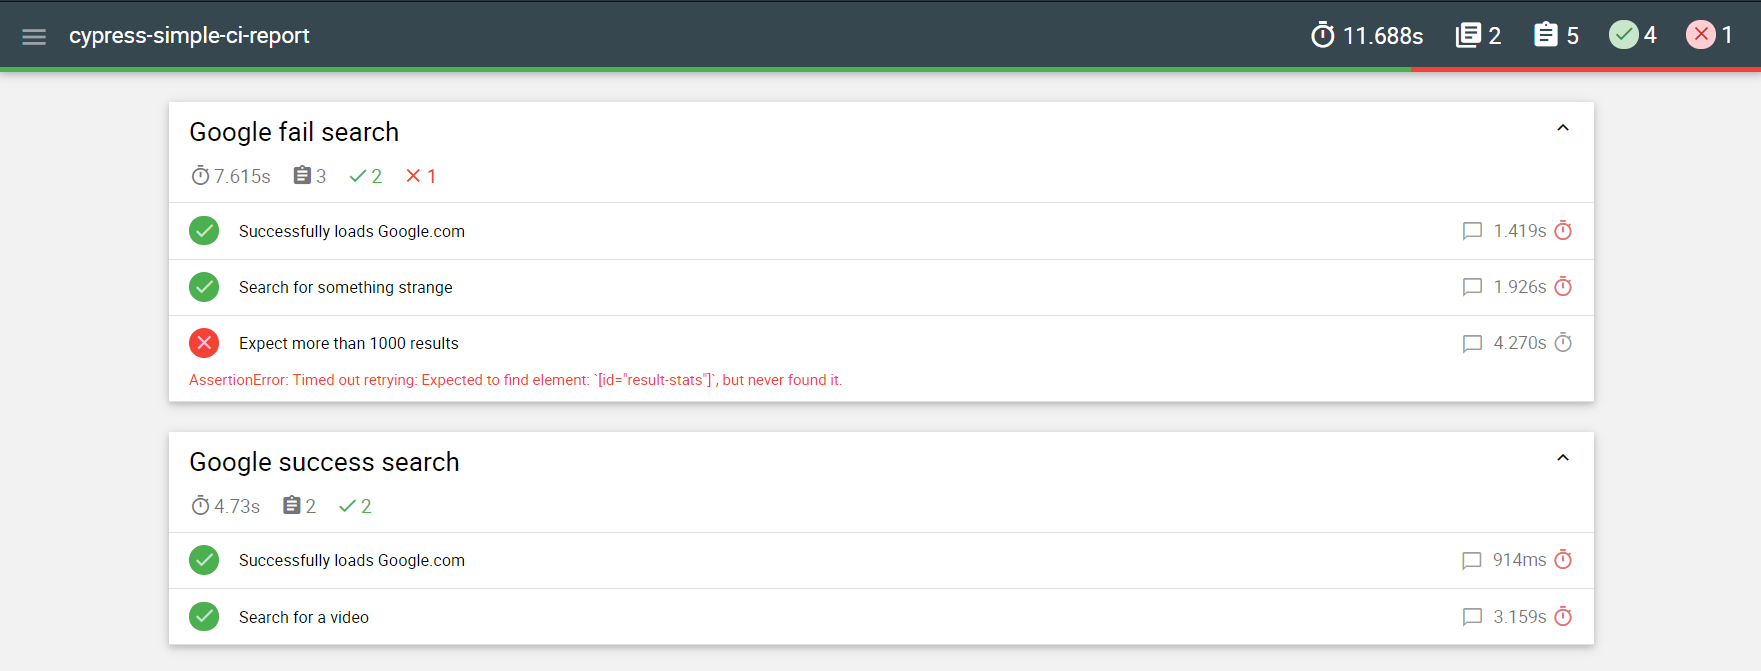
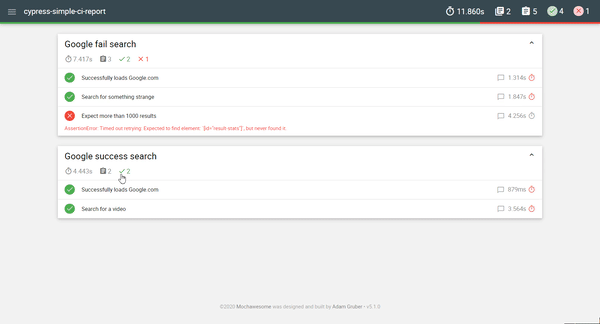
But it’s not what I would like to talk about today. I would like to show how to set up Cypress project so that it will automatically generate HTML report with test execution and publish it on GitHub Pages, like here.
Let’s roll up sleeves and create a simple project with two test cases — one which will go successfully and second one which will fail.
If you haven’t installed Cypress yet, follow the instructions from the official website. It’s very easy.
Create a Cypress project #
To create a new project open the terminal and run commands:
$ npm install cypress

$ npm init

$ ./node_modules/.bin/cypress open
After that Cypress window should open up:

By default Cypress prepared couple exemplary tests, which we don’t need. To remove them go to the project folder and delete examples folder which is inside the ./cypress/integration.
Now create there whatever tests you like. Here are my examples of searching something in Google:
describe('Google success search', () => {

    it('Successfully loads Google.com', () => {
        cy.visit('https://www.google.com')
    })

    it('Search for a video', () => {
        cy.get('[name="q"]')
        .type('never gonna give you up youtube')
        .should('have.value', 'never gonna give you up youtube')
        .type('{enter}')
    })
  })
describe('Google fail search', () => {

    it('Successfully loads Google.com', () => {
        cy.visit('https://www.google.com')
    })

    it('Search for something strange', () => {
        cy.get('[name="q"]')
        .type('anqqaxc a57k2..')
        .should('have.value', 'anqqaxc a57k2..')
        .type('{enter}')
    })

    it('Expect more than 1000 results', () => {
        cy.get('[id="result-stats"]').contains('100 results')
    })
  })
To check if tests are running smoothly go to opened Cypress window click on Run all specs button (top-right corner).
Define GitHub workflow #
We can run test locally, so let’s move on to automate its execution with GitHub Actions which will result in HTML report published on GitHub Pages.
Therefore I assume that you already has GitHub account and a repository for your project.
Next, in the project root folder create a directory .github/workflows and inside of it a cypress-report.json file.
name: Create Cypress report
on:
  push:
    branches:
      - 'master'

jobs:
  cypress-e2e-chrome81:
  name: Run on Chrome 81
  runs-on: ubuntu-18.04
  container: cypress/browsers:node12.16.2-chrome81-ff75
  steps:

    - uses: actions/checkout@v2

    - name: Install a project with a clean slate
      run: |
        npm ci
        $(npm bin)/cypress cache path
        $(npm bin)/cypress cache list
        $(npm bin)/cypress verify

    - name: Run Cypress tests
      run: npm run test:chrome
      continue-on-error: true

    - name: Copy test execution videos
      run: |
        mkdir public
        cp -r cypress/videos public/videos

    - name: Merge test results into one
      run: npm run report:merge

    - name: Generate HTML report
      run: npm run report:generate

    - name: Deploy report page
      uses: peaceiris/actions-gh-pages@v3
      with:
        github_token: ${{ secrets.GITHUB_TOKEN }}
        publish_dir: ./public
        user_name: 'github-actions[bot]'
        user_email: 'github-actions[bot]@users.noreply.github.com'
Starting from a top, we’re defining GitHub Actions workflow’s name and under which conditions it will be triggered. I’ve chosen to trigger it after pushing new commit into the master branch.
Next, there is a jobs section, with only one job defines — cypress-e2e-chrome81
jobs:
  cypress-e2e-chrome81:
    name: Run on Chrome 81
    runs-on: ubuntu-18.04
    container: cypress/browsers:node12.16.2-chrome81-ff75
Above we define the name of a workflow ( Run on Chrome 81 ), which host runner will be used ( ubuntu-18.04 ) and finally in what Docker container this workflow will be running ( cypress/browsers:node12.16.2-chrome81-ff75).
I wanted to run my tests on Chrome 81, but if you prefer to run on a different web browser you can easily change that by switching the container. The list of all available containers could be found on Cypress’s Docker Hub account.
Then we can move on to the steps of a workflow.
- uses: actions/checkout@v2

- name: Install a project with a clean slate
      run: |
        npm ci
        $(npm bin)/cypress cache path
        $(npm bin)/cypress cache list
        $(npm bin)/cypress verify
First we need to set up a job, by checking out the code from the master branch and then downloading and installing all necessary dependencies for running tests.
- name: Run Cypress tests
  run: npm run test:chrome
  continue-on-error: true
After that we can run our tests in a web browser. There is here the continue-on-error flag set to true because even if our tests fail we want to run other workflow steps responsible for generating a report.
In order to make this step work we need to set up couple of things. First go to the package.json file and add following line to the “scripts” :
"scripts": {
  "test:chrome": "cypress run --browser chrome"
}
Next, in the terminal run following command to install mochawesome dependencies:
npm install --save-dev mocha cypress-multi-reporters mochawesome
Next, in the cypress.json file define mochawesome reporter:
{
    "reporter": "cypress-multi-reporters",
    "reporterOptions": {
        "configFile": "reporter-config.json"
    }
}
It has a reference to reporter-config.json file which needs to be created (in the same directory as cypress.json):
{
    "reporterEnabled": "mochawesome",
    "mochawesomeReporterOptions": {
        "reportDir": "cypress/results/json",
        "overwrite": false,
        "html": false,
        "json": true
    }
}
You may wonder why the html option is false . Don’t worry, that’s correct. The CLI command that’s defined in package.json will generate one report per test file. But as we need to have only one, big report we need to merge them. It’s only possible with JSON reports and mochawesome-merge library, which we add in a following step.
But that’s not everything. We need to assign a video file (which is created by default by Cypress) to each test result. Therefore add these lines to the ./cypress/support/index.js file:
import './commands'
import addContext from 'mochawesome/addContext'

Cypress.on("test:after:run", (test, runnable) => {

    let videoName = Cypress.spec.name
    videoName = videoName.replace('/.js.*', '.js')
    const videoUrl = 'videos/' + videoName + '.mp4'

    addContext({ test }, videoUrl)
});
After that we can move on to a following step.
- name: Copy test execution videos
  run: |
    mkdir public
    cp -r cypress/videos public/videos
Here we create a public folder which will hold HTML code with all assets necessary for a report.
Also in this step, test resulting videos are copied to the public folder.
As it was mentioned before, the cypress run –browser chrome CLI command generates multiple JSON reports. Therefore we need to merge them into one.
- name: Merge test results into one
  run: npm run report:merge
To achieve it we need first install another mochawesome dependency:
npm install --save-dev mochawesome-merge
And add a new script to the package.json file:
"scripts": {
  ... ,
  "report:merge": "mochawesome-merge cypress/results/json/*.json > index.json"
}
Great, now we have a single index.json report file. Let’s generate an HTML report from that.
- name: Generate HTML report
  run: npm run report:generate
Again, for that we will need another dependency to be added:
npm install --save-dev mochawesome-report-generator
And inside of the package.json file add the last script:
"scripts": {
  ... ,
  "report:generate": "marge index.json --reportDir public --assetsDir public/assets --reportPageTitle index.html"}
And the last step is to publish generated static page.
- name: Deploy report page
  uses: peaceiris/actions-gh-pages@v3
  with:
    github_token: ${{ secrets.GITHUB_TOKEN }}
    publish_dir: ./public
    user_name: 'github-actions[bot]'
    user_email: 'github-actions[bot]@users.noreply.github.com'
For that I’m using special GitHub Action. It requires couple of arguments, like github_token (which will be read by workflow from the env variable) and directory where static page is located.
I’ve also added two optional arguments — user_name & user_email because this step will be creating a new commit on every page deployment. By default this user would be me (even if a workflow is doing it), therefore for clarity, I’ve change it to github-actions[bot] .
And the last thing which we need to do is to create gh-pages branch on GitHub and check if GitHub Pages feature is enable for your project.
The latter can be found on GitHub, on a project site in Setting -> Options.

There is there a GitHub Pages section in which you need to make sure that a Source is set up to the gh-pages branch.

At last, we can check if everything is set up correctly. To do that just commit all the changes and push to GitHub, which will trigger the action.

Great! Enter a report page, you’ve just deployed. It will be available on address http://{GITHUB_ACCOUNT_NAME}.github.io/{PROJECT_NAME}, like it’s for my project: https://wkrzywiec.github.io/cypress-simple-ci-report/
Schedule test execution #
The project is set up, so now what else we can do?
Usually we would like to run tests not only when we change tests itself, but also (and probably it’s more relevant) when a new feature is introduced to the application which our tests are checking.
Therefore we could run such test after each deployment to make sure that in a new version of an application there are no breaking changes or just schedule to run those tests every day as regression tests.
Here I would like to show you how to achieve a second goal, but it’s also possible with GitHub Actions to run tests after committing changes in another project.
To set up a scheduler for GitHub Actions just add following lines to the .github/workflows/cypress-report.json file:
    name: Create Cypress report
    on:
      push:
        branches:
          - 'master'
      schedule:
        - cron: '0 8 1-31 * *'
The above syntax says that this workflow will be triggered everyday at 8 am UTC. To help you set up your own cron, visit this website.
And that’s it! I hope you’ve enjoyed this entry and it will help you automate your E2E tests.
As usual, here is the source code for mentioned project:
wkrzywiec/cypress-simple-ci-report | github.com